The Japanese art of paper folding is known as origami. Folding is described by the Japanese words "ori" and "kami," which translates to "paper" in English.
In origami, different types of models can be created by origami enthusiasts. There are complex designs that can be more difficult for beginners to create.
However, there are a small number of simple folds that can be combined in different ways to create complex designs. These paper models are easy to fold for origami beginners to create brilliant origami designs.
To create easy origami for beginners, simple, thin origami papers are typically required to make it easy to fold the paper and create origami designs.
[ Origami is a valuable skill to learn. Discover why here]
Below is a step-by-step procedure to make easy origami for beginners.

Easy origami bird
Typically creating an origami bird is quite difficult because of the level of difficulty in folding the wings. However, this is an easy folding procedure for beginners to create an origami bird similar to the complex designs.
Step 1: Begin with an origami paper square. You can either use plain or colorful origami paper for this design. If all you have is standard 8.5 x 11 paper, use these directions to create a square page.
Step 2: Fold the top corner of the paper toward the bottom corner to create a half-fold. You ought to have a triangle that is upside down.
Step 3: When the top is folded down, the edge should be about halfway down. This flap will become the wings, so don't make it too thin.
Step 4: Reverse the paper to the other side and fold the bottom corner of the top layer.
Step 5: The next step is to fold the left side of the figure across to the right to fold it in half.
Step 6: Fold the same flap back to create one of the wings and fold the opposite wing-back.
Step 7: Flatten and draw in the center of the head using the technique referred to as an inside reverse fold and then turn the paper fold up to see your perfectly created origami bird.

Origami heart
Origami hearts are a special design that brings joy to friends, siblings, spouses, and even parents. It's wonderful to put origami hearts in party bags or attach them to gift wrap. They look beautiful on bedroom walls and greeting cards. Additionally, they create lovely handmade Valentine's Day presents.
They can be designed by following these simple steps.
Step 1: Start with a square of white-side-up origami paper. Also, you can follow these steps to create a square sheet if all you have is standard 8.5 x 11 paper.
Step 2: The paper should be folded in half from top to bottom, then unfolded.
Step 3: After unfolding the paper, then fold the left corner to the right corner and then unfold the paper.
Step 4: Next, fold the top corner to the center and then fold the bottom corner to the top edge.
Step 5: The bottom right and left edges should be folded into the central crease.
Step 6: Fold the side and top corners inward and finally, you have your origami heart.
Origami flapping butterfly
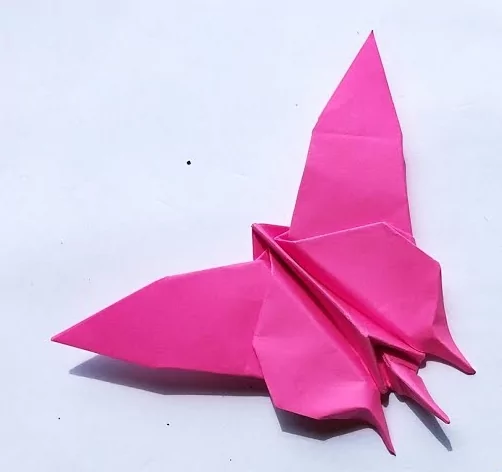
The origami flapping butterfly model is one of the most common origami designs because it’s very beautiful but also, it’s very easy to create.
A simple secret to designing an ideal origami flapping butterfly is to utilize a half sheet of 8” to 10” origami paper to make sure that it’s not so thick and it flaps better.
Step 1: Start with an origami paper square, color side down. However, if you only have ordinary rectangular paper, you can also follow these directions for making an origami flapping butterfly.
Step 2: Simply align the edges as you fold the bottom to the top, then unfold.
Step 3: The next step is to fold the top and bottom edges to connect at the center.
Step 4: To create a horizontal crease in the middle, fold in all four corners so that their edges touch.
Step 5: Fold the top half downward.
Step 6: Fold the bottom half's center across to the top half. Only use your fingernail to make a little crease within an inch (2.5 cm) of the center. Don't fully crease the paper.
When you take your finger out, you should only see a crease in the middle.
Sep 7: Reverse the paper.
Step 8: With your other hand, tightly wrap the paper around your finger by placing it on top of the center of the paper.
Step 9: Once your finger is removed, you should have a loop. Prick the bottom of the loop in the middle with your fingernail.
Step 10: Grab the loop holes' two ends with your forefinger and thumb, then pinch them together.
To make the butterfly flap, pinch and then release. Feel free to draw your designs on your butterfly.
Origami car
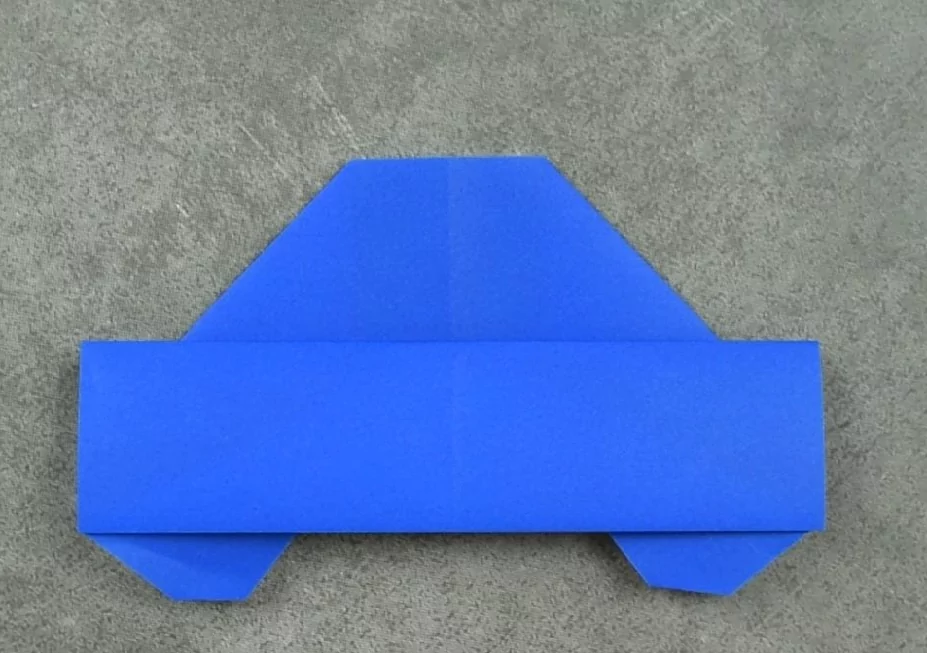
The origami car design is particularly interesting and cool to kids which makes it a great design to know how to create. Thankfully, the origami car design is a simple model to create.
Step 1: Ideally, you should begin with an origami paper square, color side down. However, if you only have standard rectangle paper, you can also create an origami car by following these steps.
Step 2: The paper should be folded in half, top to bottom, and then unfolded.
Step 3: Fold the paper once more from left to right, then unfold it once more.
Step 4: Next, to the central crease, fold the bottom edge.
Step 5: The bottom flap's left and right sides should then be folded down diagonally to create the wheels.
Step 6: At the horizontal seam, fold down the top portion so that it completely encloses the wheels.
Step 7: Fold it back up approximately 3/4 of the way now and then fold down the top right corner.
Step 8: Now turn the figure over to get your origami car design.
There are many other origami design models you can explore even as a beginner but these are just a few of the easy origami for beginners. Feel free to create as many as you can following these simple steps!
- Cricut Hat Press: A Comprehensive Guide on Usage - August 13, 2023
- Unlocking Creativity with the Cricut Joy: A Comprehensive Guide - August 12, 2023
- The Ultimate Guide to the Cricut Maker Bundle - August 11, 2023

