Origami, the Japanese art of paper folding, has been celebrated for centuries as a creative and intricate practice. Among its myriad of creations, the origami box stands out as a timeless classic. In this comprehensive guide, we'll take you through the step-by-step process of crafting origami boxes that can serve as elegant containers for gifts, keepsakes, or decorative pieces. Whether you're a novice or an experienced origami enthusiast, making origami boxes can be a rewarding and enjoyable experience that allows you to explore your creativity and dexterity.
video courtesy of Crafts And Kutir
Materials You'll Need
Before embarking on your origami journey, gather these essential materials:
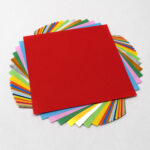
- Origami paper (square piece)
- A flat, clean surface for folding
- Patience and a sense of adventure
Choosing the Perfect Paper for Your Origami Boxes
The foundation of a successful origami box lies in the choice of origami paper. Selecting the right type is crucial for achieving the desired outcome. For the classic origami box, opt for a square piece of origami paper. This type of paper strikes a balance between durability and flexibility, making it ideal for intricate folds.
Colorful paper also lends a more vibrant and eye-catching element to your origami box.
Step 1: Creating Diagonal Creases
Start by placing the origami paper with one corner pointing towards you. Gently fold the paper in half diagonally, corner to corner, forming a triangle. Unfold the paper and repeat the process in the opposite direction. These diagonal creases will guide your subsequent folds and ensure precision in your origami box.
Step 2: Initiating the Folds
Flip the paper over, keeping the creases face down. Fold the paper in half both horizontally and vertically, making sure the edges align perfectly. Unfold the paper after each fold to establish creases that intersect at the center.
Step 3: Forming the Initial Base
Return the paper to its original side, with the creases facing up. Bring all four corners of the paper towards the center, folding along the diagonal creases you previously created. As you do this, you'll witness the transformation of the paper into a smaller square – the preliminary structure of your origami box.
Step 4: Folding the Top Corners
Take one corner of the square and fold it towards the center, aligning it with the point where the diagonal creases meet. Repeat this step for the remaining three corners. This process marks the commencement of your origami box's recognizable shape.
Step 5: Crafting the Lid
For the lid of your origami box, create diagonal folds on the top corners, folding them inward. This action will establish the edges of the lid. Tuck the first flap under the second flap, ensuring a snug fit. Replicate this action on the opposite side, finalizing the lid's structure.
Step 6: Folding the Edges
Flip the paper over to reveal the other side. Fold the paper along the middle creases on both sides, drawing the edges towards the center. This action reinforces the integrity of your origami box's structure.
Step 7: Constructing the Bottom
Gently open the flaps on one side of the paper. As you do this, the sides will naturally elevate, forming the walls of the box. Press the sides downward to flatten the paper and create the bottom of the box.
Step 8: Securing the Flaps
Take the previously pushed-down flaps and tuck them beneath the central flaps of the box. This ensures a stable foundation for your origami box, allowing it to maintain its shape effectively.
Step 9: Completing Your Origami Box
Congratulations! You've now successfully created an origami box. Open the lid and consider placing small gifts, trinkets, or other treasures inside. Your origami box is not just a practical container but also a testament to your creativity and dedication.
Customizing Origami Boxes for Any Occasion
Origami boxes are incredibly versatile and can be tailored to various events and celebrations. Whether you're using origami boxes as charming gift containers or as exquisite decorative pieces, they are suitable for a plethora of occasions. With the right origami paper and a dash of ingenuity, you can craft origami boxes that add a touch of elegance to weddings, birthdays, anniversaries, and more.
Embracing Creativity with Origami
After mastering the fundamental steps of creating origami boxes, it's time to explore diverse variations and techniques. Experiment with patterned origami paper to infuse visual interest into your boxes. Embellish your origami boxes with bows, ribbons, or even hand-drawn designs to add a personalized touch to your creations.
Origami Boxes: A Time-Honored Art
Origami's enduring appeal lies in its ability to connect generations through the art of paper folding. Crafting origami boxes enables you to participate in this tradition while showcasing your artistic flair. Whether you're a seasoned origami devotee or a novice taking your first steps into this captivating world, designing origami boxes can be an enchanting and fulfilling endeavor.
In Conclusion
Origami boxes fuse the realms of creativity and utility, transforming a mere sheet of paper into a remarkable piece of artistry. Regardless of whether you're commemorating a special event or indulging in a creative pursuit, the act of crafting origami boxes is both gratifying and joyous. Prepare your materials, follow the step-by-step instructions meticulously, and embark on your journey of folding, creasing, and shaping to generate your unique origami boxes. Embrace the experience of origami, where each fold unveils a world of possibilities and delights. Happy folding!
- Cricut Hat Press: A Comprehensive Guide on Usage - August 13, 2023
- Unlocking Creativity with the Cricut Joy: A Comprehensive Guide - August 12, 2023
- The Ultimate Guide to the Cricut Maker Bundle - August 11, 2023

