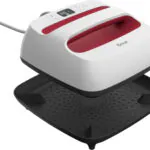
The Cricut Hat Press is an innovative device designed for perfecting custom hat designs. Utilizing cutting-edge technology, the Cricut Hat Press provides an efficient and user-friendly solution for applying heat transfers to hats with precision. In this article, we will delve into the ins and outs of using the Cricut Hat Press, exploring its features, benefits, and step-by-step instructions for achieving flawless custom hat designs.
video courtesy of Cricut
1. Introduction to the Cricut Hat Press
The Cricut Hat Press is a cutting-edge tool designed to elevate your custom hat creations to new heights. With its advanced technology and user-friendly interface, this device allows you to seamlessly transfer intricate designs onto hats, caps, and more.
2. What Sets the Cricut Hat Press Apart
What makes the Cricut Hat Press stand out is its curved heat plate, specially engineered to match the shape of hats. This curved heat plate ensures even heat distribution, eliminating hotspots and ensuring flawless heat transfer results.
3. Getting Started: Unboxing and Assembly
Upon receiving your new Cricut Hat Press, carefully unbox it and follow the assembly instructions provided. Once assembled, you're ready to embark on your creative journey.
4. The Power of Cricut Heat App
The Cricut Heat App is an indispensable tool that enhances your experience with the Cricut Hat Press. This app allows you to control the heat press remotely, send precise time and temperature settings, and monitor your projects from your mobile device.
5. Creating Your Custom Hat Design
Using your preferred design software or the Cricut Design Space, create your unique custom hat design. Ensure that the dimensions fit within the pressing area of the Cricut Hat Press for optimal results.
6. Preparing the Hat and Materials
Before pressing, ensure your hat is clean and free of debris. Additionally, cut your iron-on material to fit the design area of the hat precisely.
7. Understanding Temperature Settings
The Cricut Hat Press offers various heat settings to accommodate different materials. Consult the user manual for recommended temperature settings based on the material you're using.
8. Using the Cricut Hat Pressing Form
The Cricut Hat Pressing Form is an essential accessory that ensures your hat stays in place during pressing. It creates a firm surface for the heat transfer, preventing any creases or misalignment.
9. Step-by-Step Guide: Using the Cricut Hat Press
- Connect your Cricut Hat Press to the power source and turn it on.
- Open the Cricut Design Space and load your custom hat design.
- Place your hat on the Cricut Hat Pressing Form to ensure proper alignment.
- Position your design on the hat, ensuring it fits within the pressing area.
- Set the desired temperature and time using the Cricut Heat App or the controls on the machine.
- Place the hat on the curved heat plate, aligning it with the pressing area.
- Close the Cricut Hat Press and let it work its magic.
- Once the pressing is complete, carefully remove the hat and let it cool before wearing.
10. Exploring Heat Transfer Applications
The Cricut Hat Press opens up a world of possibilities for heat transfer applications. From custom hats to apparel and accessories, this versatile tool allows you to experiment with various designs and materials.
11. Achieving Wrinkle-Free Heat Transfers
Wrinkles can mar the perfection of your heat transfers. Ensure your materials are wrinkle-free and use strong heat-resistant tape to secure them in place before pressing.
12. Safety First: Cricut Hat Press's Safety Conscious Features
The Cricut Hat Press is equipped with safety-conscious features, including an auto-off feature that ensures the device turns off after a period of inactivity. This feature not only conserves energy but also provides peace of mind.
13. The Magic of Infusible Ink
Infusible Ink is a revolutionary heat transfer material that transforms into a vibrant, permanent design when heated. The Cricut Hat Press is compatible with Infusible Ink, allowing you to create truly unique and stunning designs.
14. Working with Major Brands of Iron-On Material
The Cricut Hat Press is designed to work seamlessly with major brands of iron-on material. This compatibility ensures a worry-free experience and outstanding results every time.
15. Mastering Sublimation Projects with Safety Base
For sublimation projects, the safety base of the Cricut Hat Press provides an ideal pressing surface. This surface ensures your designs adhere perfectly to the hat, resulting in professional-quality outcomes.
16. Design Space Integration: The Perfect Companion
The Cricut Hat Press integrates seamlessly with the Cricut Design Space, making it an excellent companion for your crafting endeavors. Design, edit, and personalize your projects with ease.
17. Ideal Pressing Surface: The Key to Success
Achieving exceptional heat transfer results requires an ideal pressing surface. The Cricut Hat Press offers just that, ensuring your designs adhere flawlessly to the hat's surface.
18. Custom Hats: Let Your Creativity Shine
The Cricut Hat Press empowers you to create custom hats that reflect your unique style and personality. Whether you're designing for yourself or as gifts, the possibilities are endless.
19. Wireless Connection and Precise Timing
Thanks to its wireless connection capabilities, you can send precise time and temperature settings to the Cricut Hat Press via Bluetooth. This feature allows you to control your projects with convenience and accuracy.
20. Overcoming Challenges: Curved Surfaces and Trucker Hats
Working with curved surfaces, such as trucker hats, can present challenges. However, the Cricut Hat Press is designed to accommodate such surfaces, ensuring your designs adhere seamlessly.
In conclusion, the Cricut Hat Press is a remarkable tool that opens up a world of creative possibilities. With its advanced features, safety-conscious design, and compatibility with various materials, it's an excellent complement to your crafting arsenal. Whether you're a seasoned designer or a novice enthusiast, the Cricut Hat Press works beautifully to bring your custom hat visions to life. Embrace the power of heat press technology, explore new horizons in design, and enjoy a worry-free experience as you create stunning custom hats that stand out in style.
- Cricut Hat Press: A Comprehensive Guide on Usage - August 13, 2023
- Unlocking Creativity with the Cricut Joy: A Comprehensive Guide - August 12, 2023
- The Ultimate Guide to the Cricut Maker Bundle - August 11, 2023


