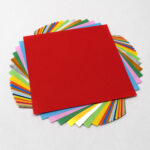
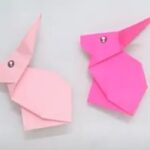
The term “origami” has historically been associated with Japanese culture and it refers to the art of paper folding. In recent times, however, origami is used generally to describe all folding practices regardless of where they originated from in terms of culture.
In origami, the objective is to use folding and sculpting methods to turn a flat square sheet of paper into a finished sculpture.
With the plethora of origami designs available today, the options of which origami to make may be quite daunting for origami lovers and enthusiasts.
This article contains the step-by-step process of 5 simple origami designs that can be made by anyone including kids.
Origami fish
The origami fish is one of the simplest origami designs for origami lovers to create especially for kids and this makes it one of the coolest designs to make.
You can follow these processes step-by-step to create a simple origami fish
Step 1: Begin from the back of your origami paper.
Step 2: To the left edge, fold the right edge over.
Step 3: The next step is to unfold the previous step.
Step 4: Diagonally fold the top left and right corners into the middle.
Step 5: Right and left lower edges should next be folded toward the center.
Step 6: Up till the highest point, fold the bottom edge.
Step 7: Right and left bottom corners should then be folded diagonally into the middle.
Step 8: The next step is to unfold the previous 2 steps you did and then reverse fold the creases you made in step 7.
Step 9: Pushing the lower left and right flaps inside, raise the bottom edge.
Step 10: The top flap should now be folded in half.
Step 11: The front flap's upper left and right corners should be folded down diagonally. Optionally, turn the flaps behind to fasten the tail.
Step 12: Finally, the finished origami fish is on the other side of the paper when you flip it over.
To adorn your new origami fish companion, you can create a face, fins, scales, or even add colorful washi tape.
Origami Cup
Origami cups are a particularly common origami model with their origin traceable to traditional origami designs.
Another thing that makes it popular is its simplicity of design and you can follow these simple steps to create an origami cup.
Step 1: Begin with an origami paper square but if all you have is a standard 8.5x11 paper, you can also use these steps to create a square page.
Step 2: Fold the bottom corner to the top corner of the paper to fold it in half.
Step 3: Fold the triangle's left edge to the bottom edge and then unfold it. Only the crease line is required.
Step 4: Fold the triangle's left corner to the right end of the crease line.
Step 5: The next step is to fold the right corner to the left corner and after this, down flap the top flap.
Step 6: Reverse the paper and fold the top flap downward one more.
Step 7: Finally, reverse the paper once again and open the pocket.
Paper fortune teller origami
The paper fortune teller origami design is an absolute favorite for kids and they love to play with it. It can also be used to help improve their ability to imagine and think.
An added advantage of this origami design is that it is one of the simplest designs anyone can learn to create. Below are simple step-by-step instructions to create a paper fortune teller origami model.
Step 1: Begin with an origami paper square but if you only have ordinary rectangular paper, you can also follow these instructions to create your paper fortune teller.
Step 2: Fold the bottom left corner to the top right corner to halve the paper, then unfold.
Step 3: Fold the bottom right corner to the top left corner once more to fold the paper in half, then unfold once more.
Step 4: After folding the bottom edge to the top edge of the paper in half, unfold it again.
Step 5: Up next, unfurl the paper once more after folding it in half once more from left to right.
Step 6: Fold the four corners toward the middle.
Step 7: Reverse the paper.
Step 8: Fold each of the four corners once more toward the middle.
Step 9: All of the triangles can now be colored or labeled differently.
Step 10: Close the flaps once more after writing a fortune underneath each color.
Step 11: The bottom half should be folded up, and your thumbs and forefingers should be tucked into the four spaces below.
Finally, the paper fortune teller is now available for you to play with.
Origami envelope
This origami design usually appears to be quite difficult to fold because of its fancy design and edges. However, the origami envelope is quite simple to fold.
Below are the straightforward step-by-step instructions to follow;
Step 1: Ideally, you should begin with a square piece of origami paper, but you can also create a square sheet using standard 8.5x11 paper by following these steps.
Step 2: Fold the bottom half of the paper into the top half to create a triangle after arranging it like a diamond.
Step 3: The triangle's top corner should now be folded toward the bottom edge.
Step 4: Fold in one-third of the triangle's right side.
Step 5: The triangle's left side should then be folded in.
Step 6: Fold the corner of that flap back to the edge.
Step 7: Squeeze the tiny flap to create a diamond-shaped pocket by opening it.
Step 8: Fold the top down.
Step 9: Put the tip inside the pocket with the diamond shape.
Step 10: Now, you can fill the envelope with a memo or letter that you have written.
Traditional origami boat
The traditional origami boat is one of the most popular origami designs and while they may appear to be difficult to fold, they can be created by following these simple steps.
Step 1: You’ll need to use rectangular origami paper to create this design.
Step 2: The next step required is to fold the top edge down to the bottom edge.
Step 3: Make a tiny wrinkle after moving the right corner to the left and then unfold it.
Step 4: Lower the top left and top right corners using the crease as a starting point.
Step 5: Flatten the paper until the flaps are nicely aligned.
Step 6: Fold the lower edge's topmost layer up and then do the same thing on this side when you flip the paper over.
Step 7: Open the model's bottom portion by picking up the paper; it will now resemble a hat.
Step 8: Flatten the material into a diamond shape after joining the two ends.
Step 9: Up to the highest point, fold the bottom flap.
Step 10: Repeat the previous process after flipping the model over to the other side.
Step 11: Once more, take hold of the model and open it like a hat.
Step 12: Make it even flatter so that it resembles a little diamond.
Step 13: After that, extend the two top left and right points. This will give the shape of a boat.
Step 14: Flatten the boat.
Step 15: Finally, inside the boat, you’ll have a few loose flaps that can be folded in to hide them if you find them bothersome.
There are a variety of origami models anyone can learn to fold, however, these 5 are simple designs that can be learned by every origami enthusiast.
- Cricut Hat Press: A Comprehensive Guide on Usage - August 13, 2023
- Unlocking Creativity with the Cricut Joy: A Comprehensive Guide - August 12, 2023
- The Ultimate Guide to the Cricut Maker Bundle - August 11, 2023

