Are you excited to make your Christmas tree special? A couple of folds and a few snips and you’re ready to go, this magical 3D Origami Christmas Tree is so simple to make.
Do you want to make these cute little paper Christmas trees? Instead of spending yet more money on last-minute decorations, a pretty last-minute paper decoration for your holiday table that means you’ll make a whole forest in minutes. So Let's get started.
3D Origami for Christmas Tree:
If you’re looking for a last-minute holiday craft, what’s everyone making this weekend, to decorate your home, here’s a quick and easy one. Christmas origami tree.
3D Origami Christmas Tree Video
You can watch it on YouTube. Click here -> Best 3D Origami Christmas Tree Video
Material required:
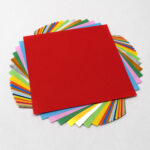
You need 6 green origami papers:
- 18x18 cm green Colored Origami Paper
- 16x16 cm green Colored Origami Paper
- 14x14 cm green Colored Origami Paper
- 12x12 cm green Colored Origami Paper
- 10x10 cm green Colored Origami Paper
- 8x8 cm green Colored Origami Paper
Along with the following additional paper:
- 1 brown origami paper:
- 18x18 cm brown Colored Origami Paper
Steps to make a 3D Origami Christmas Tree:
Follow these steps to make Christmas Tree: Once you get the hang of it they are super quick and simple to make. Although I’ve called this project easy it can be a little bit tricky at first (around step 15-16)
- Start by laying your green square origami paper down and fold this corner up to the top.
- Fold it in half edge, open your piece of paper back out and then fold it in half again but this time in the other direction as well. Following this step, in fact, fold the whole thing in half.
- Open back out and fold in half again this time across both diagonals and flip it over.
- Open out by facing up. Press flat. You should now have a diamond shape and open up the fold.
- Fold the sides in to meet at the center crease as well.
- Now you have to flip over and repeat on the other side and you should now have an upside-down kite shape.
- Open one of the flaps back out and flatten, take the outer edge and collapse it by folding it into the center.
- Repeat for the other side.
- Flip it over and repeat the steps for other origami papers of all green with different sizes
- Green flowers of 6 different sizes you have made now.
- Take brown paper and follow the video steps to make the lower part of the tree.
- Starting from the right fold each and cut a line down to make a small triangle.
- Fold to the left like a page and repeat by folding down each cut line on the right.
- Keep folding and turning until all the branches have been folded.
- Repeat on the other side.
- Open out your origami tree's lower part and stand.
- Take all green flowers and put 18*18cm at the bottom and 8*8cm at the top. Now Put this bulk on the brown paper and a beautiful tree is prepared.
Conclusion:
The best thing about these trees Is that you can fold them back and tuck them away when Christmas is over. In fact, store them flat (inside an old book) and bring them back out in the coming year.
- Cricut Hat Press: A Comprehensive Guide on Usage - August 13, 2023
- Unlocking Creativity with the Cricut Joy: A Comprehensive Guide - August 12, 2023
- The Ultimate Guide to the Cricut Maker Bundle - August 11, 2023


