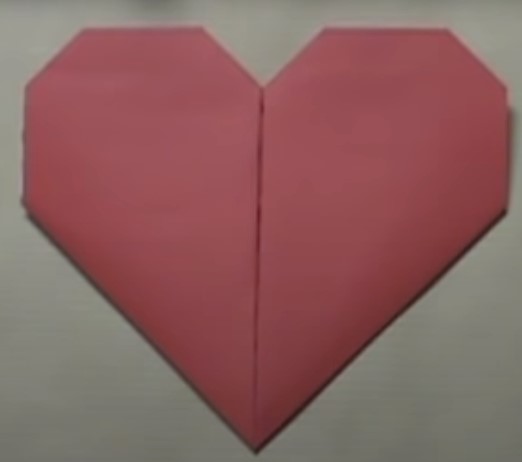
Origami hearts have captured the essence of heartfelt gestures for generations. With a simple sheet of origami paper and a few strategic folds, you can create an exquisite origami heart that serves as a charming token of affection. Whether it's Valentine's Day, Mother's Day, or just an ordinary day when you want to express your love, learning how to make an origami heart is a delightful and creative endeavor. In this step-by-step guide, we will walk you through the process of crafting your own origami heart, showcasing the art of paper folding and turning it into a symbol of love.
Materials Needed:
Before you begin, gather the following materials:
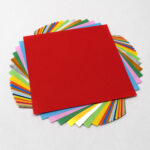
- Origami paper (square sheet)
- A flat, clean surface to work on
- Your undivided attention and a dash of patience
Step 1: Preparing the Origami Paper
Start with a square piece of origami paper. If you don't have origami paper, you can easily create a square sheet by folding a rectangular piece diagonally from the top left corner to the bottom right corner.
Trim off the excess paper along the bottom edge, leaving you with a perfect square.
Step 2: Creating Diagonal Creases
Fold the square paper in half diagonally from the top left corner to the bottom right corner. Unfold it to reveal a crease down the center.
Repeat the process by folding the paper diagonally from the top right corner to the bottom left corner. Unfold it again to create intersecting diagonal creases that form an "X" on the paper.
Step 3: Folding the Top Layer
Bring the top edge of the paper down to meet the bottom edge, aligning the creases. Press down to create a fold.
Unfold the paper completely, returning to the square shape. Your diagonal creases will guide the next steps.
Step 4: Folding the Left and Right Sides
Fold the left side of the square paper towards the center, aligning it with the vertical crease. Press down to create a fold.
Repeat the same fold with the right side, bringing it towards the center and aligning it with the vertical crease.
Step 5: Forming the Heart Shape
Fold the top left corner of the paper diagonally towards the center, aligning it with the vertical and horizontal creases. Press down to create a fold.
Repeat the same fold with the top right corner, bringing it diagonally towards the center and aligning it with the existing creases.
Step 6: Making the Bottom Edge Folds
Take the bottom edge of the paper and fold it upwards, aligning it with the top point of the heart shape. Press down to create a fold.
Fold the bottom edge once more, this time aligning it with the top edge of the heart shape. Press down firmly to create crisp folds.
Step 7: Folding the Bottom Points
Gently fold the bottom left corner of the heart shape diagonally towards the center, aligning it with the previous folds. Press down to create a fold.
Repeat the same fold with the bottom right corner, bringing it diagonally towards the center and aligning it with the other folds.
Step 8: Flipping the Paper
Flip the paper over to the other side. Your origami heart is starting to take shape!
Fold the paper in half by bringing the left edge towards the right edge. Press down to create a fold along the vertical centerline.
Step 9: Folding the Left Points
Fold the left point of the paper heart diagonally towards the center, aligning it with the top layer. Press down to create a fold.
Repeat the fold with the bottom left corner, bringing it diagonally towards the center and aligning it with the other folds.
Step 10: Tucking and Folding the Right Side
Take the right point of the paper heart and fold it diagonally towards the center, tucking it underneath the left point. Press down to create a fold.
Fold the entire right side of the heart towards the left, aligning it with the left edge of the heart shape. Press down to create a fold.
Step 11: Folding the Top Points
Fold the top layer of the left side diagonally towards the center, aligning it with the other folds. Press down to create a fold.
Repeat the fold with the top layer of the right side, bringing it diagonally towards the center and aligning it with the other folds.
Step 12: Forming the Pocket
Carefully unfold the previous top layer folds on both sides. You will notice two triangular flaps at the top.
Lift the left and right flaps and gently pull them outward. As you do this, the top of the heart will open up and create a pocket-like structure.
Step 13: Folding the Bottom Edges
Turn the origami heart upside down.
Fold the bottom left and bottom right corners diagonally towards the center of the heart, aligning them with the creases. Press down to create folds.
Step 14: Unfolding and Adjusting
Carefully unfold the flaps you created in the previous step.
Gently pull the bottom edges apart and press the center of the heart to create a subtle crease that defines the bottom of the heart.
Step 15: Finishing Touches
Fold the bottom left and bottom right corners slightly inward to create a more rounded shape for the bottom of the heart.
Tuck the top points of the heart inside the pocket you created earlier. These will form the top edges of your origami heart.
Step 16: Personalizing Your Origami Heart
Write a sweet love note on a small piece of paper and tuck it into the pocket of the origami heart. This adds a heartfelt touch to your creation.
You can also experiment with different colors of origami paper to create a vibrant collection of origami hearts.
Step 17: Displaying Your Origami Heart
Your origami heart is now complete and ready to be displayed or gifted.
Place your origami heart on a shelf, use it as a decoration, or give it to someone special as a token of your affection.
Video Tutorials and Additional Resources:
For visual guidance, you can watch video tutorials on various online platforms, such as YouTube. Search for "origami heart tutorial" on your favorite video-sharing website.
There are also origami books and websites dedicated to teaching you how to make different origami hearts, each with its own unique style and folding technique.
Conclusion: Crafted with Love and Paper
Origami hearts are not just folded pieces of paper; they are expressions of love and creativity. By following these step-by-step instructions, you can create your own origami heart and infuse it with your emotions. Whether you're celebrating Valentine's Day, Mother's Day, or simply want to show someone that you care, an origami heart is a charming way to make your feelings known. Remember, the art of origami isn't just about folding paper; it's about the joy of creation and the love that goes into each delicate fold. So, grab an origami paper, let your fingers dance in the delicate art of paper folding, and make an origami heart that will forever hold a special place in your heart.
Enjoy the fun and satisfaction of turning a square sheet of paper into a heartfelt masterpiece! Happy folding!
(Video courtesy of EzOrigami)
- Cricut Hat Press: A Comprehensive Guide on Usage - August 13, 2023
- Unlocking Creativity with the Cricut Joy: A Comprehensive Guide - August 12, 2023
- The Ultimate Guide to the Cricut Maker Bundle - August 11, 2023

