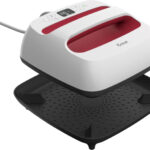
The Cricut machine is a versatile tool that allows crafters to create intricate and colorful designs for a wide range of projects. One of the exciting features of the Cricut is its ability to cut and layer multiple colors of materials to produce stunning and dynamic creations. Whether you're making personalized decals, multi-colored iron-on designs, or layered cardstock projects, learning how to work with multiple colors on Cricut will take your crafting to a whole new level. In this comprehensive guide, we'll walk you through the step-by-step process of using multiple colors on your Cricut machine, along with tips, tricks, and project ideas to inspire your creativity.
Understanding the Basics of Working with Multiple Colors
Before we dive into the practical steps, let's understand some essential concepts when it comes to working with multiple colors on your Cricut machine:
1. Layered Design:
A layered design consists of different elements, each cut from a different color of material. These elements are then stacked on top of each other to create a visually appealing and vibrant final design.
2. Welding:
Welding is a Cricut Design Space feature that permanently joins two or more shapes together. Welding is often used in multi-color projects to ensure that the individual pieces of a design fit together perfectly.
3. Attach:
The Attach feature in Design Space allows you to keep the positions of different elements fixed relative to each other. This is particularly useful for layered designs, ensuring that the different colors align correctly during cutting.
4. Slice:
The Slice feature allows you to remove overlapping parts of shapes or letters from each other. This can be useful for creating unique shapes and separating colors in a design.
Step-by-Step Guide to Using Multiple Colors on Cricut
Let's walk through the process of creating a multi-color project on your Cricut machine:
Step 1: Choose Your Design
- Open Cricut Design Space on your computer or mobile device.
- Either create a new design or select a pre-made design from the Cricut library.
Step 2: Set Up Color Layers
- Once you have your design on the canvas, determine which elements you want to cut in different colors. Identify the layers that will form the different colors of your project.
- For each color, duplicate the respective design elements to create separate copies for each color layer.
Step 3: Color Selection
- Choose the color of material you want to use for each layer. You can either select colors from the Cricut materials available or manually enter the RGB values of custom materials.
Step 4: Position the Layers
- Arrange the layers on the canvas so they align correctly, forming the complete design. Use the Align and Distribute tools in Design Space to ensure precise alignment.
- Use the Attach feature to keep the positions of different layers fixed relative to each other.
Step 5: Weld and Slice (If Needed)
- If your design requires any welding or slicing to create unique shapes or separate colors, perform these actions on the respective design elements.
- Weld together any shapes that need to be joined to create a single piece.
- Use the Slice tool to remove overlapping parts of shapes or letters that need to be separated.
Step 6: Prepare for Cutting
- Once your design is ready, make sure each color layer is assigned to the appropriate color material in Design Space.
- Click on the "Make It" button in the top-right corner of the screen.
Step 7: Cut and Layer
- Load the first color of material onto the cutting mat and follow the on-screen prompts to cut the first layer.
- After the first layer is cut, unload the mat and carefully remove the cut elements.
- Load the next color of material onto the mat and cut the next layer.
- Repeat this process for each color layer of your design.
Step 8: Assemble Your Project
- Once all the layers are cut, carefully align and stack them on top of each other to assemble the final design.
- Use adhesive, such as craft glue or foam dots, to adhere the layers together.
- Double-check the alignment and positioning to ensure a precise and visually appealing result.
Tips and Techniques for Multi-Color Projects
To get the best results and enhance your multi-color projects, consider these tips and techniques:
1. Choose Complementary Colors:
Select colors that complement each other well to create a harmonious and visually striking design.
2. Use Transfer Tape:
When working with multi-color iron-on designs, use transfer tape to layer the different colors accurately onto your project surface.
3. Use Different Materials:
Experiment with different materials for each color layer, such as vinyl, cardstock, iron-on, or adhesive foil, to add texture and dimension to your design.
4. Test Cuts:
Perform test cuts on scrap materials before cutting your final design to ensure proper settings and alignment.
5. Calibrate Print Then Cut:
If your project involves Print Then Cut, ensure your printer and Cricut machine are calibrated for accurate alignment.
Project Ideas for Multi-Color Designs
Here are some project ideas that you can create using multiple colors on your Cricut machine:
1. Vinyl Decals:
Design colorful decals for laptops, water bottles, or home decor items.
2. Greeting Cards:
Create multi-color cards with intricate layered designs.
3. Iron-On Apparel:
Make personalized multi-color iron-on designs for t-shirts, tote bags, and more.
4. Party Decorations:
Craft vibrant banners, cake toppers, and centerpieces for parties and celebrations.
5. Scrapbook Layouts:
Design eye-catching and layered scrapbook pages with different colors and patterns.
6. Wall Art:
Create wall art with multi-color designs that add a pop of color to any room.
Conclusion
Mastering the art of using multiple colors on your Cricut machine opens up endless possibilities for creativity and expression. By understanding the basics of layering, welding, and attaching in Cricut Design Space, you can create stunning multi-color designs that will impress and inspire. Remember to choose complementary colors, experiment with different materials, and perform test cuts to achieve the best results. Whether you're making vinyl decals, iron-on apparel, or colorful greeting cards, working with multiple colors on Cricut will take your crafting to new heights. So, gather your materials, fire up your Cricut machine, and let your imagination run wild as you embark on your multi-color crafting journey! Happy crafting!
To find out more about Cricut, please visit any of the following areas:
- How to use cricut infusible ink
- How to make stickers with cricut
- How to make cricut mat sticky again
- How to iron on cricut vinyl
- How to download fonts to cricut
- How to make stencils with cricut
- How to use a cricut
- What is a cricut machine
- How to cut cardstock on cricut
- How to make cake toppers with cricut
- How to put vinyl on cricut mat
- Why is my cricut not cutting
- How to make shirts with cricut
- How to slice in cricut design space
- How to use svg files with cricut craft room
- Why does my cricut keep disconnecting
- How to load cricut mat
- How to curve text on cricut
- How to curve an image on cricut
- How to use cricut card mat
- How to make coasters with cricut
- Why is my cricut power button red
- Why won’t my cricut connect to my computer
- How to calibrate cricut
- How to make stickers with cricut joy
- How to mirror on cricut
- How to do multiple colors on cricut
- How long does a cricut blade last
- How to emboss with cricut
- How to save cricut design as pdf
- Cricut Hat Press: A Comprehensive Guide on Usage - August 13, 2023
- Unlocking Creativity with the Cricut Joy: A Comprehensive Guide - August 12, 2023
- The Ultimate Guide to the Cricut Maker Bundle - August 11, 2023

