Cardstock cutting with the Cricut machine opens up a world of possibilities for crafters, enabling them to create stunning invitations, intricate scrapbook layouts, and personalized paper crafts. In this comprehensive guide, we will explore the step-by-step process of cutting cardstock on the Cricut, along with essential tips, settings, and safety measures. Whether you're a novice or an experienced crafter, mastering cardstock cutting on the Cricut will empower you to bring your creative visions to life.
Understanding the Cricut Machine
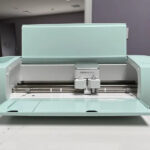
The Cricut machine is a cutting-edge electronic cutter that utilizes precise blades to cut through a wide range of materials, including cardstock. Available in various models, the Cricut is known for its user-friendly design and intuitive software interface, making it accessible to crafters of all skill levels.
The Cricut comes with a Cricut Design Space software that enables users to upload or create their own designs, giving them full control over their projects' customization.
Preparing Your Cardstock
Before embarking on the cardstock cutting process, ensure you have selected the right cardstock for your project. Choose a cardstock weight that aligns with the Cricut's recommended specifications, typically ranging from 60-100 lb.
To avoid any complications during cutting, make sure the cardstock is free from creases, wrinkles, or other deformations.
Flatten the cardstock by placing it under a heavy book or using a specialized tool, such as a brayer, to achieve a smooth, even surface. Properly flattened cardstock prevents warping during the cutting process, leading to more accurate cuts.
Selecting the Right Settings
One of the key elements to achieve precise cardstock cutting on the Cricut is selecting the appropriate settings. The Cricut Design Space offers various material settings, and choosing the right one is crucial for successful cutting.
Factors such as the cardstock's weight and thickness determine the ideal setting. Refer to the Cricut's manual or website for specific settings for various types of cardstock.
Experimenting with Test Cuts
To ensure the settings are accurate and minimize material wastage, it is essential to conduct test cuts on small pieces of cardstock.
Performing test cuts allows you to fine-tune the settings and make any necessary adjustments before cutting the entire project.
Blade Adjustments
A sharp and properly adjusted blade is crucial for achieving clean and precise cardstock cuts. The Cricut's blade can be adjusted for different depths, accommodating varying cardstock thicknesses.
Regularly inspect the blade for any signs of wear and replace it when necessary. A dull blade can lead to jagged edges and uneven cuts, compromising the overall quality of your project.
Mat Preparation
The cutting mat plays a significant role in ensuring the cardstock remains securely in place during the cutting process. Proper mat preparation helps prevent shifting and misalignment during cutting.
Clean the cutting mat thoroughly, removing any debris or residue from previous projects. An unclean mat may impact adhesion and cause the cardstock to shift during cutting.
Use a brayer or scraper tool to apply even pressure to the cardstock, ensuring it adheres securely to the mat. This step is particularly important for intricate designs that require precise cutting.
Design Optimization
When designing projects for cardstock cutting, simplicity is key. Avoid overly intricate details that may lead to tearing or challenges during cutting.
For the best results, consider enlarging the design slightly to ensure the Cricut's blade can handle the cutting with ease. Larger designs are also easier to weed and handle post-cutting.
Organizing Multiple Elements
If your project includes multiple elements to be cut from different cardstock colors or patterns, organize the design in the Cricut Design Space to maximize material usage.
Group similar elements together and position them strategically on the mat to minimize wastage and save on cardstock.
Preparing the Cricut Machine
Before initiating the cutting process, ensure that your Cricut machine is in good working condition. Check for software updates and calibrate the machine if needed.
Place the cutting mat with the adhered cardstock onto the machine's mat loading area. Make sure the mat aligns correctly with the machine's guides for precise cutting.
Setting Up the Cricut Design Space
Open the Cricut Design Space on your computer or mobile device. If you don't have the software installed, you can access it online through your browser.
Upload or select the design you want to cut from your cardstock. Ensure that the design is within the cutting area and adjust its size if necessary.
Loading Cardstock and Initiating the Cut
Feed the mat into the Cricut machine using the Load button or lever. The machine will detect the mat and prompt you to select the corresponding material setting.
Once you've confirmed the settings, press the Cut button to begin the cutting process. The Cricut will precisely cut the cardstock according to your design and settings.
Monitoring the Cutting Process
While the Cricut is cutting, it's essential to remain attentive and close by. In case of any issues, you can quickly pause or stop the machine to avoid any damage.
Observe the machine's progress and ensure that the cardstock is cutting correctly. Avoid opening the machine during the cutting process, as it may lead to inaccuracies.
Unloading the Mat
Once the cutting is complete, the Cricut will prompt you to unload the mat. Press the Unload button or lever to release the mat from the machine.
Remove the cardstock from the mat carefully. If any small pieces remain on the mat, use a weeding tool to gently remove them.
Weeding the Design
Weeding refers to the process of removing excess cardstock from your design, leaving only the desired cut elements.
Use a weeding tool or tweezers to lift and peel away the excess cardstock. Take your time and work slowly to avoid damaging delicate cuts.
Applying the Cardstock Elements
Once your design is fully weeded, prepare the surface where you want to apply the cardstock elements.
Apply adhesive to the back of the cardstock elements and carefully position them on the surface. Press down firmly to ensure a secure bond.
Embellishing and Finishing Touches
With your cardstock elements in place, it's time to add any additional embellishments to enhance your project's overall look.
Consider using various crafting techniques, such as embossing, ink blending, or adding glitter accents, to add depth and personality to your creation.
Storing Your Cardstock
To preserve the quality of your cardstock, store it in a cool, dry place, away from direct sunlight and moisture.
Consider investing in acid-free cardstock storage solutions to prevent yellowing and discoloration over time.
Maintaining Your Cricut Machine
Proper maintenance of your Cricut machine is essential for long-lasting performance and precision cutting.
Clean the machine's blade housing regularly and replace the blade as needed. Also, clean the cutting mat to ensure it maintains its adhesive properties.
Periodically check the machine's calibration to ensure accurate cutting and adjust it if necessary.
Troubleshooting Common Issues
Despite the Cricut's advanced capabilities, you may encounter some common issues during the cardstock cutting process.
Refer to the Cricut's troubleshooting guide or online resources to address issues such as misalignment, incomplete cuts, or cutting errors.
Regular maintenance and proper troubleshooting will help keep your Cricut machine in top-notch condition and ensure optimal cutting results.
Conclusion
Mastering cardstock cutting on the Cricut is an empowering skill that allows crafters to create intricate and personalized projects.
By understanding the Cricut machine, selecting the right settings, and following best practices, you can achieve impeccable results with your cardstock projects.
Embrace the joy of crafting with the Cricut and let your imagination soar as you transform simple cardstock into stunning works of art. Happy crafting!
To find out more about Cricut, please visit any of the following areas:
- How to use cricut infusible ink
- How to make stickers with cricut
- How to make cricut mat sticky again
- How to iron on cricut vinyl
- How to download fonts to cricut
- How to make stencils with cricut
- How to use a cricut
- What is a cricut machine
- How to cut cardstock on cricut
- How to make cake toppers with cricut
- How to put vinyl on cricut mat
- Why is my cricut not cutting
- How to make shirts with cricut
- How to slice in cricut design space
- How to use svg files with cricut craft room
- Why does my cricut keep disconnecting
- How to load cricut mat
- How to curve text on cricut
- How to curve an image on cricut
- How to use cricut card mat
- How to make coasters with cricut
- Why is my cricut power button red
- Why won’t my cricut connect to my computer
- How to calibrate cricut
- How to make stickers with cricut joy
- How to mirror on cricut
- How to do multiple colors on cricut
- How long does a cricut blade last
- How to emboss with cricut
- How to save cricut design as pdf
- Cricut Hat Press: A Comprehensive Guide on Usage - August 13, 2023
- Unlocking Creativity with the Cricut Joy: A Comprehensive Guide - August 12, 2023
- The Ultimate Guide to the Cricut Maker Bundle - August 11, 2023

