Cricut vinyl is a fantastic material that allows crafters and DIY enthusiasts to create personalized and professional-looking projects with ease. Whether you want to make custom t-shirts, bags, home decor items, or gifts, iron-on vinyl opens up a world of creative possibilities. In this comprehensive guide, we will walk you through the step-by-step process of using Cricut iron-on vinyl, along with tips, tricks, and techniques to achieve picture-perfect results.
Introduction to Cricut Iron-On Vinyl
Cricut iron-on vinyl, also known as heat transfer vinyl (HTV), is a thin, flexible material that adheres to fabric or other surfaces when heat is applied. The process of applying iron-on vinyl involves cutting a design on the vinyl using a Cricut cutting machine, weeding out the excess vinyl, and then using a heat source, such as an iron or a heat press, to transfer the design onto the desired surface.
Materials Needed
Before diving into the process, gather the necessary materials:
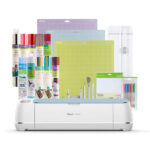
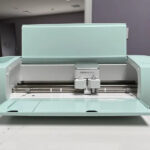
- Cricut Cutting Machine: Ensure that your Cricut machine is set up and connected to your computer or mobile device, ready to cut the vinyl.
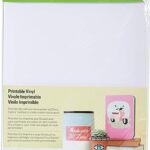
- Cricut Iron-On Vinyl: Choose the color and type of vinyl that suits your project best. Cricut offers a variety of finishes, including matte, glossy, glitter, and holographic.
- Cricut StandardGrip Cutting Mat: Use the appropriate cutting mat for your machine and vinyl size.
- Weeding Tools: These tools help you remove the excess vinyl from your design.
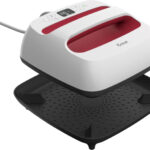
- Heat Source: You can use a household iron or a heat press. A heat press is recommended for more consistent and even results.
- Cricut EasyPress Mat: This mat provides a stable surface for ironing and ensures even heat distribution.
- Teflon Sheet or Parchment Paper: To protect your vinyl and surface during the heat application.
- Fabric or Surface: Choose the fabric or surface you wish to apply the iron-on vinyl to. Cotton or cotton-blend fabrics work well for apparel projects.
Step-by-Step Guide to Iron-On Cricut Vinyl
Design and Cutting
- Design Your Project: Use Cricut Design Space, the software that comes with your Cricut machine, to create or import the design you want to cut. You can also access a library of pre-made designs if you need some inspiration.
- Mirror the Design: Since iron-on vinyl is applied with the carrier sheet facing down, you must mirror your design horizontally before cutting. Otherwise, your design will appear backward after transfer.
- Load the Vinyl: Place the iron-on vinyl on the cutting mat with the shiny side facing down. Load the mat into the Cricut machine and ensure it's correctly aligned.
- Cut the Design: Select the appropriate settings in Cricut Design Space for the type of vinyl you are using. Then, let the machine work its magic and cut out your design.
Weeding
- Remove the Vinyl from the Mat: Carefully remove the vinyl from the cutting mat, ensuring not to bend or distort the material.
- Weed the Design: Use weeding tools to remove the excess vinyl around your design. Be patient and meticulous, especially with intricate designs.
- Reverse Weeding (Optional): For more complex designs, consider using the reverse weeding technique. This involves removing the negative space of the design instead of the actual design itself.
Preparing for Heat Application
- Preheat the Surface: If you're applying the vinyl to fabric, preheat the fabric by running the iron over it for a few seconds. This step removes any wrinkles and moisture, ensuring a smooth application.
- Position the Design: Place the weeded vinyl on your fabric or surface, ensuring it's centered and aligned correctly. Use heat-resistant tape to secure it in place if needed.
- Temperature and Pressure Settings: Refer to the manufacturer's instructions for the recommended temperature and time settings for your specific vinyl and heat source. Generally, Cricut's EasyPress machines have a recommended temperature chart based on the material and vinyl type.
Heat Application
- Protection Layer: Place a Teflon sheet or parchment paper over the vinyl design to protect it from direct heat exposure.
- Ironing or Heat Pressing: Apply heat using an iron or a heat press according to the recommended settings. For an iron, press firmly and evenly, making sure to cover the entire design area. With a heat press, follow the instructions for temperature, time, and pressure settings.
- Cooling and Peeling: Allow the vinyl to cool down before gently peeling off the carrier sheet. Start from one corner and peel back slowly at a 45-degree angle. If any part of the vinyl doesn't adhere, lay the carrier sheet back down and reapply heat.
- Layering Vinyl (Optional): If your design involves multiple colors or layers, repeat the cutting, weeding, and heat application process for each layer. Ensure that each layer is appropriately aligned to create a cohesive design.
Tips and Techniques for Perfect Results
- Test on Scrap Material: Before applying vinyl to your final project, practice on a scrap piece of fabric or surface to get familiar with the process and settings.
- Use a Heat Press for Larger Projects: While an iron works well for smaller projects, a heat press is more efficient and ensures consistent heat distribution for larger projects or bulk production.
- Warm Peel vs. Cold Peel: Some iron-on vinyl requires a warm peel (peeling off the carrier sheet immediately after applying heat), while others require a cold peel (allowing the vinyl to cool before peeling). Always follow the manufacturer's instructions for the specific vinyl you are using.
- Avoid Steam: Do not use steam during the ironing process, as it may cause the vinyl to lift or not adhere properly.
- Wash and Care Instructions: Once the vinyl is applied, wait at least 24 hours before washing the fabric. Follow the care instructions provided with the vinyl to maintain its longevity.
- Layering Order: If you're layering multiple vinyl colors, start with the bottom layer and work your way up to the top layer. Be mindful of how the layers align to create a seamless design.
- Design Complexity: For intricate designs, choose a vinyl type that's easy to weed and has good adhesion properties.
Conclusion
Iron-on Cricut vinyl is a versatile and fun material that empowers crafters to bring their creative visions to life. By following this step-by-step guide and implementing the tips and techniques provided, you'll be well on your way to creating stunning and professional-looking projects with Cricut iron-on vinyl. Whether you're making custom apparel, home decor, or personalized gifts, the possibilities are endless with this fantastic crafting material. Happy crafting!
To find out more about Cricut, please visit any of the following areas:
- How to use cricut infusible ink
- How to make stickers with cricut
- How to make cricut mat sticky again
- How to iron on cricut vinyl
- How to download fonts to cricut
- How to make stencils with cricut
- How to use a cricut
- What is a cricut machine
- How to cut cardstock on cricut
- How to make cake toppers with cricut
- How to put vinyl on cricut mat
- Why is my cricut not cutting
- How to make shirts with cricut
- How to slice in cricut design space
- How to use svg files with cricut craft room
- Why does my cricut keep disconnecting
- How to load cricut mat
- How to curve text on cricut
- How to curve an image on cricut
- How to use cricut card mat
- How to make coasters with cricut
- Why is my cricut power button red
- Why won’t my cricut connect to my computer
- How to calibrate cricut
- How to make stickers with cricut joy
- How to mirror on cricut
- How to do multiple colors on cricut
- How long does a cricut blade last
- How to emboss with cricut
- How to save cricut design as pdf
- Cricut Hat Press: A Comprehensive Guide on Usage - August 13, 2023
- Unlocking Creativity with the Cricut Joy: A Comprehensive Guide - August 12, 2023
- The Ultimate Guide to the Cricut Maker Bundle - August 11, 2023


