Cricut Infusible Ink is a revolutionary heat transfer material that allows crafters to create vibrant, long-lasting, and professional-quality designs on compatible surfaces. With Infusible Ink, your creations become a seamless part of the base material, making them durable, fade-resistant, and machine-washable. In this comprehensive guide, we will walk you through everything you need to know about using Cricut Infusible Ink, from materials and design to application and finishing touches, to achieve stunning, personalized projects.
Understanding Cricut Infusible Ink
Cricut Infusible Ink is a transfer material that is activated by heat to infuse directly into compatible surfaces, such as Cricut Infusible Ink compatible blank products. Unlike traditional heat transfer vinyl, Infusible Ink dyes the fibers of the base material rather than sitting on top, resulting in a design that becomes a permanent part of the product.
Infusible Ink comes in two main formats:
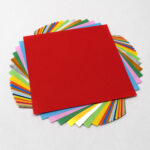
- Infusible Ink Transfer Sheets: These are pre-inked sheets with vibrant colors and patterns. They are used to cut designs with a Cricut cutting machine and transferred onto the compatible base material.
- Infusible Ink Pens and Markers: These special pens and markers are used to draw or write directly onto compatible paper or laser copy paper, which can then be transferred onto the base material.
Materials Needed
Before diving into the Infusible Ink process, gather the necessary materials:
- Cricut Cutting Machine: Ensure your Cricut machine is set up and connected to your computer or mobile device, ready for cutting Infusible Ink designs.
- Cricut Infusible Ink Transfer Sheets or Pens/Markers: Choose the colors and patterns that suit your project best. Infusible Ink comes in a wide array of shades and styles.
- Cricut EasyPress or Heat Press: Infusible Ink requires high and consistent heat for proper activation. A Cricut EasyPress or heat press is recommended for best results.
- Cricut EasyPress Mat or Butcher Paper: To protect your work surface and ensure even heat distribution during the transfer process.
- Cricut Compatible Blank Products: Cricut offers a range of blank products specifically designed to work with Infusible Ink, such as t-shirts, totes, coasters, and more.
- Cricut Heat-Resistant Tape: This tape helps secure the Infusible Ink design in place during heat application.
- Lint Roller: To ensure the blank product's surface is free of lint or debris before the transfer.
- Cardstock or Laser Copy Paper: If using Infusible Ink Pens or Markers, use cardstock or laser copy paper as the transfer medium.
- Scissors or Weeding Tools: For cutting and weeding the Infusible Ink designs.
Step-by-Step Guide to Using Cricut Infusible Ink
Step 1: Designing Your Infusible Ink Project
- Software Setup: Launch Cricut Design Space on your computer or mobile device and start a new project.
- Create or Import Design: Design your project by either creating your own artwork or importing pre-made designs or images from Cricut Design Space's extensive library.
- Mirror the Design (For Transfer Sheets Only): If you're using Infusible Ink Transfer Sheets, remember to mirror (reverse) your design horizontally before cutting. This step ensures that the design appears correctly after transfer.
- Adjusting Size and Layout: Resize and arrange your designs on the virtual canvas to fit your blank product's dimensions. Make sure the designs are within the cutting area for your Cricut machine.
Step 2: Cutting Infusible Ink Designs
- Select Material Setting: In Cricut Design Space, choose the appropriate material setting for Infusible Ink Transfer Sheets or Pens/Markers.
- Load the Mat: Load your Infusible Ink Transfer Sheet onto a Cricut StandardGrip cutting mat, ink side up. If using Infusible Ink Pens/Markers, load your cardstock or laser copy paper onto the mat.
- Send the Design to Cricut: Connect your Cricut machine to your computer or mobile device and send the design to the machine using Bluetooth or a USB connection.
- Check Settings: Before cutting, double-check that the correct material setting and blade depth are selected in Cricut Design Space.
- Start Cutting: Press the "Go" or "Start" button on your Cricut machine to begin cutting the Infusible Ink design.
- Unload the Mat: Once the cutting is complete, unload the cutting mat from the Cricut machine.
Step 3: Preparing the Blank Product
- Selecting a Blank Product: Choose a compatible Cricut blank product, such as a t-shirt or coaster, to transfer your Infusible Ink design onto.
- Preheat Your Cricut EasyPress or Heat Press: Follow the recommended temperature and time settings for your blank product and the type of Cricut EasyPress or heat press you're using. Preheating helps ensure an even and consistent transfer.
- Lint Rolling the Blank Product: Before applying the Infusible Ink design, thoroughly lint roll the blank product to remove any lint, dust, or debris that could interfere with the transfer process.
Step 4: Applying Infusible Ink Transfer Sheet
- Position the Design: Carefully place your Infusible Ink design onto the blank product with the ink side facing down. Use Cricut heat-resistant tape to secure the design in place.
- Cover with Butcher Paper: Lay a sheet of Cricut butcher paper or plain laser copy paper over the entire design and blank product. This prevents any excess ink from transferring to the heat press or EasyPress.
- Heat Application: Place the heated Cricut EasyPress or heat press over the butcher paper, ensuring full coverage of the design. Apply firm, even pressure for the recommended time.
- Cool and Remove: After the transfer time is complete, carefully remove the heat source and allow the blank product to cool completely before removing the butcher paper and Infusible Ink transfer sheet.
Step 5: Applying Infusible Ink Pen/Marker Designs
- Draw or Write on Transfer Medium: Using Cricut Infusible Ink Pens or Markers, draw or write your design on the cardstock or laser copy paper transfer medium.
- Position the Design on Blank Product: Carefully place the transfer medium with the Infusible Ink design side down onto the blank product. Secure it in place with Cricut heat-resistant tape.
- Cover with Butcher Paper: Follow the same steps as above by covering the design and blank product with Cricut butcher paper or plain laser copy paper.
- Heat Application: Apply heat with your heated Cricut EasyPress or heat press, following the recommended temperature and time settings for the specific blank product
Conclusion
Cricut Infusible Ink is a game-changer for crafters and DIY enthusiasts, offering a revolutionary way to create professional-quality and long-lasting designs on compatible surfaces. With Infusible Ink, your creations become a seamless and vibrant part of the base material, making them durable, fade-resistant, and machine-washable.
By following the step-by-step guide and using the right materials, you can easily unlock the magic of Cricut Infusible Ink and bring your artistic visions to life. Whether you're creating custom apparel, accessories, coasters, or any other compatible product, Infusible Ink allows you to achieve stunning and personalized results that are bound to impress.
Remember to pay close attention to the heat application process, as proper temperature and timing are crucial for the successful transfer of Infusible Ink designs. Preparing your blank products, selecting the right designs, and following the recommended guidelines ensure that your projects turn out flawlessly.
With Cricut Infusible Ink, the possibilities for creativity and personalization are limitless. So, unleash your imagination, explore various techniques, and let the magic of Cricut Infusible Ink elevate your crafting endeavors to new heights. Happy crafting!
- How to make stickers with cricut
- How to make cricut mat sticky again
- How to iron on cricut vinyl
- How to download fonts to cricut
- How to make stencils with cricut
- How to use a cricut
- What is a cricut machine
- How to cut cardstock on cricut
- How to make cake toppers with cricut
- How to put vinyl on cricut mat
- Why is my cricut not cutting
- How to make shirts with cricut
- How to slice in cricut design space
- How to use svg files with cricut craft room
- Why does my cricut keep disconnecting
- How to load cricut mat
- How to curve text on cricut
- How to curve an image on cricut
- How to use cricut card mat
- How to make coasters with cricut
- Why is my cricut power button red
- Why won’t my cricut connect to my computer
- How to calibrate cricut
- How to make stickers with cricut joy
- How to mirror on cricut
- How to do multiple colors on cricut
- How long does a cricut blade last
- How to emboss with cricut
- How to save cricut design as pdf
- Why won’t my cricut connect to my phone
- How to sharpen cricut blade
- How to cancel cricut subscription
- How to Change a Cricut Blade
- How to clean cricut mat
- Can You Unweld In Cricut Design Space?
- How using a 3D Scanner helps in GlowForge and Cricut projects
- Can I make temporary tattoos with cricut?
- Cricut Hat Press: A Comprehensive Guide on Usage - August 13, 2023
- Unlocking Creativity with the Cricut Joy: A Comprehensive Guide - August 12, 2023
- The Ultimate Guide to the Cricut Maker Bundle - August 11, 2023

