Embossing is a popular technique in the world of crafting that adds texture and dimension to various projects. With a Cricut machine, you can take your embossing to a whole new level by combining the precision of cutting with the artistry of embossing. Embossing with Cricut opens up a world of creative possibilities, allowing you to add beautiful raised designs to paper, cardstock, vellum, and other materials. In this comprehensive guide, we'll walk you through the step-by-step process of embossing with your Cricut machine, along with tips, techniques, and project ideas to inspire your crafting journey.
Understanding Embossing and Cricut
Before we delve into the embossing process with Cricut, let's briefly understand what embossing is and how Cricut machines can be utilized in this technique:
What is Embossing?
Embossing is a decorative technique that involves creating raised or recessed designs on various materials, typically paper or cardstock. It adds texture and depth to the surface, making the design stand out and giving it an elegant and professional look.
There are two primary types of embossing:
- Dry Embossing: Dry embossing, also known as "paper embossing," is done using embossing folders and a manual embossing machine. The embossing folder has a raised design on one side and a corresponding debossed design on the other side. When the paper is sandwiched between the folder and embossed with the machine, the design is transferred to the paper.
- Heat Embossing: Heat embossing involves using special embossing powders, heat tools, and stamps. An embossing ink pad is used to stamp the design on the paper, and then embossing powder is sprinkled on the wet ink. The excess powder is tapped off, and the design is set and raised using a heat tool.
Embossing with Cricut
Cricut machines are primarily known for their cutting capabilities, but with the right tools and techniques, they can also be used for embossing. By utilizing the Cricut machine's scoring stylus or fine-point blade along with various embossing techniques, you can create beautiful and intricate embossed designs on a wide range of materials.
Cricut's ability to emboss opens up exciting possibilities for personalized greeting cards, invitations, party decorations, and more.
Tools and Materials for Embossing with Cricut
Before you start embossing with your Cricut machine, you'll need to gather the necessary tools and materials:
Tools:
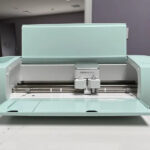
- Cricut Machine: Any model of Cricut Explore or Cricut Maker can be used for embossing.
- Scoring Stylus: The scoring stylus is essential for creating precise score lines that will be embossed later.
- Embossing Pens: Cricut offers a range of embossing pens that work seamlessly with the Cricut machines.
- Standard Grip Mat: Use a standard grip mat to secure your material during the embossing process.
- Embossing Folder (Optional): Although Cricut machines can emboss without the use of an embossing folder, you can enhance your designs with the added texture from an embossing folder.
Materials:
- Cardstock: Choose high-quality cardstock in various colors for embossing your designs.
- Embossing Powders (Optional): If you wish to heat emboss, you'll need embossing powders in your preferred colors.
- Embossing Ink (Optional): Embossing ink is used in heat embossing to stamp the design before applying the embossing powder.
Step-by-Step Guide to Embossing with Cricut
Follow these step-by-step instructions to emboss with your Cricut machine:
Step 1: Prepare Your Design in Cricut Design Space
- Open Cricut Design Space on your computer or mobile device.
- Create or select the design you want to emboss. Keep in mind that simple, bold designs work best for embossing.
- Use the scoring stylus or embossing pen in place of the fine-point blade to create the score lines for the embossing.
- If you're using an embossing folder, adjust the size of your design to fit the folder.
- Once your design is ready, proceed to the "Make It" screen.
Step 2: Set Material and Tool Settings
- On the "Make It" screen, select your material type as "Cardstock."
- For embossing, choose the appropriate pressure setting for your scoring stylus or embossing pen. You can adjust the pressure under the "Custom Materials" option.
Step 3: Load Your Material and Stylus/Pen
- Place your cardstock on the standard grip mat and load it into your Cricut machine.
- Insert the scoring stylus or embossing pen into the designated slot, depending on your machine model.
Step 4: Start the Embossing Process
- Follow the prompts on the screen to start the cutting process.
- The Cricut machine will first emboss the score lines using the scoring stylus or embossing pen.
- If you're using an embossing folder, pause the machine after the score lines are done and insert the cardstock into the embossing folder. Place the folder with the cardstock back on the mat and resume the cutting process.
Step 5: Remove the Embossed Design
- Once the embossing process is complete, carefully remove the cardstock from the mat.
- If you used an embossing folder, gently remove the cardstock from the folder to reveal the textured design.
Step 6: Optional Heat Embossing (Heat Embossing)
If you want to enhance the embossed design further, you can add heat embossing:
- Apply embossing ink to the embossed areas of the design.
- Sprinkle embossing powder over the wet ink.
- Tap off the excess powder and use a heat tool to melt and set the embossing powder. The powder will raise and create a glossy, textured look.
Step 7: Finish Your Project
Once the embossing and optional heat embossing are complete, you can use the embossed design as desired in your project. Trim it to size, use it on greeting cards, scrapbook pages, or any other craft project you have in mind.
Tips and Techniques for Embossing with Cricut
To get the best results and make the most of your embossing projects with Cricut, consider these tips and techniques:
- Choose the Right Materials: High-quality cardstock works best for embossing. Experiment with different colors and textures to see how they interact with embossing techniques.
- Embossing Folder Techniques: To create different effects, you can ink the embossing folder before inserting the cardstock. This will add color to the raised parts of the design.
- Combining Embossing and Cutting: You can combine embossing and cutting in the same project. For example, you can create an embossed background and then cut out intricate designs to layer on top.
- Customize Embossing Pens: If you want more color options for your embossing, you can customize your embossing pens by filling them with different colors of embossing ink.
- Heat Embossing Tips: When heat embossing, work quickly to prevent the embossing ink from drying before you apply the embossing powder.
- Embossing on Vellum: Embossing on vellum can create a delicate and elegant look. Use a low-temperature setting on your heat tool to avoid damaging the vellum.
Project Ideas for Embossing with Cricut
Now that you're familiar with the embossing process with Cricut, here are some project ideas to spark your creativity:
- Embossed Greeting Cards: Create custom greeting cards with embossed sentiments and designs.
- Embossed Invitations: Make elegant and textured invitations for weddings, parties, or special events.
- Embossed Gift Tags: Add a personal touch to your gifts with embossed gift tags.
- Embossed Scrapbook Pages: Use embossed elements to add texture and dimension to your scrapbook layouts.
- Embossed Home Decor: Emboss designs on paper to frame and display as home decor pieces.
- Embossed Gift Boxes: Emboss patterns on cardstock to create unique gift boxes.
Conclusion
Embossing with Cricut allows you to elevate your crafting projects with texture, dimension, and elegance. With the scoring stylus or embossing pens, you can create intricate and beautiful embossed designs on various materials. Whether you're making personalized greeting cards, invitations, or scrapbook layouts, embossing with Cricut opens up a world of creative possibilities. So, gather your materials, experiment with different techniques, and let your creativity shine as you embark on your embossing journey with Cricut! Happy crafting!
To find out more about Cricut, please visit any of the following areas:
- How to use cricut infusible ink
- How to make stickers with cricut
- How to make cricut mat sticky again
- How to iron on cricut vinyl
- How to download fonts to cricut
- How to make stencils with cricut
- How to use a cricut
- What is a cricut machine
- How to cut cardstock on cricut
- How to make cake toppers with cricut
- How to put vinyl on cricut mat
- Why is my cricut not cutting
- How to make shirts with cricut
- How to slice in cricut design space
- How to use svg files with cricut craft room
- Why does my cricut keep disconnecting
- How to load cricut mat
- How to curve text on cricut
- How to curve an image on cricut
- How to use cricut card mat
- How to make coasters with cricut
- Why is my cricut power button red
- Why won’t my cricut connect to my computer
- How to calibrate cricut
- How to make stickers with cricut joy
- How to mirror on cricut
- How to do multiple colors on cricut
- How long does a cricut blade last
- How to emboss with cricut
- How to save cricut design as pdf
- Cricut Hat Press: A Comprehensive Guide on Usage - August 13, 2023
- Unlocking Creativity with the Cricut Joy: A Comprehensive Guide - August 12, 2023
- The Ultimate Guide to the Cricut Maker Bundle - August 11, 2023

