Cake toppers add a touch of elegance and personalization to any celebration cake. With the help of a Cricut cutting machine, you can create custom cake toppers that perfectly match the theme and style of your event. Whether it's a birthday, wedding, baby shower, or any other special occasion, designing and making cake toppers with Cricut opens up a world of creative possibilities. In this step-by-step guide, we will explore the process of making cake toppers using Cricut Design Space and share tips to elevate your cake decorating skills. Let's get started and bring your cake topper visions to life!
Gather Your Materials
Before diving into the cake topper design process, gather the necessary materials:
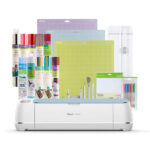
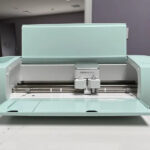
1.1. Cricut Cutting Machine: A Cricut Explore or Cricut Maker is essential for cutting the cake topper design.
1.2. Cricut Design Space: The Cricut Design Space software is where you'll create and customize your cake topper design.
1.3. Cardstock or Glitter Cardstock: Choose high-quality cardstock in the colors you want for your cake topper. Glitter cardstock adds a touch of sparkle and glam.
1.4. Adhesive: Double-sided tape, glue, or adhesive foam squares to assemble the cake topper.
1.5. Wooden Skewers or Toothpicks: Use these to create the support structure for your cake topper.
1.6. Scissors and Weeding Tools: For cutting and weeding the intricate details of your cake topper design.
1.7. Printer (optional): If you want to add printed elements to your cake topper, you'll need a printer to print the images before cutting.
Designing Your Cake Topper in Cricut Design Space
2.1. Launch Cricut Design Space: Open Cricut Design Space on your computer or mobile device and log in to your account.
2.2. Start a New Project: Click on "New Project" to begin creating your cake topper design from scratch.
2.3. Choose a Canvas Size: Select the appropriate canvas size for your cake topper, considering the dimensions of the cake you'll be decorating.
2.4. Design Your Cake Topper: Use the design tools and features in Cricut Design Space to create your cake topper design. You can add text, shapes, images, and even upload your own designs.
2.5. Personalization: Customize your cake topper with names, dates, or any other personal details that suit the occasion.
2.6. Size and Position: Resize and position your design elements on the canvas to fit the cake topper dimensions. Use the alignment tools to ensure everything is centered.
2.7. Welding (Optional): If your design has overlapping elements, use the "Weld" feature to merge them into a single shape, creating a cohesive design.
Prepare Your Material and Mat
Once your design is complete, it's time to prepare your material and mat for cutting:
3.1. Material Selection: Choose the appropriate cardstock for your cake topper design. Ensure it is of good quality to achieve clean cuts.
3.2. Load the Cutting Mat: Place the cardstock on the Cricut cutting mat, aligning it with the mat guides. Smooth out any wrinkles or bubbles to ensure a flat surface.
3.3. Load the Mat into the Cricut Machine: Insert the mat into your Cricut cutting machine and ensure it is correctly aligned.
Cut Your Cake Topper Design
With your material and mat prepared, follow these steps to cut your cake topper design:
4.1. Set Material Settings: In Cricut Design Space, select the appropriate material setting for the cardstock you're using. This ensures the machine cuts with the correct settings.
4.2. Perform a Test Cut: If you're using a new type of cardstock or you're unsure about the settings, perform a test cut on a small piece of the material to ensure it cuts cleanly.
4.3. Send to Cut: Once you're confident with the material settings, click on "Make It" in Cricut Design Space to send your cake topper design to the cutting machine.
4.4. Cut Your Design: The Cricut machine will begin cutting your cake topper design based on the selected settings. Allow the machine to complete the cutting process.
4.5. Unload the Mat: Once the machine has finished cutting, press the "Unload" button to release the mat from the machine.
Weed and Assemble Your Cake Topper
After cutting, carefully weed (remove) the excess cardstock from your cake topper design using weeding tools. Then, follow these steps to assemble the cake topper:
5.1. Gluing (For Multi-layer Designs): If your cake topper has multiple layers, use a glue stick, double-sided tape, or adhesive foam squares to adhere the layers together, creating a dimensional effect.
5.2. Attach Wooden Skewers or Toothpicks: Flip the cake topper over, and using strong adhesive, attach wooden skewers or toothpicks to the backside of the design. These will serve as the support structure for inserting the cake topper into the cake.
5.3. Allow to Dry: If you've used wet adhesive, let the cake topper dry completely before inserting it into the cake.
Inserting the Cake Topper into the Cake
When the cake topper is ready, it's time to insert it into the cake:
6.1. Positioning: Gently insert the wooden skewers or toothpicks into the top of the cake at the desired location. Adjust the position until the cake topper is centered and level.
6.2. Stability: If the cake topper feels wobbly, use additional wooden skewers or toothpicks to secure it more firmly into the cake.
Cake Topper Alternatives and Ideas
While cardstock cake toppers are a popular choice, there are other creative alternatives to consider:
7.1. Acrylic or Wood Toppers: Experiment with acrylic or wood materials for a more durable and elegant cake topper. Cricut machines can cut these materials with the appropriate tools.
7.2. Foil and Glitter: Use adhesive foil or glitter cardstock to add a glamorous touch to your cake topper.
7.3. Print Then Cut: Combine printed images with cut elements by using the Print Then Cut feature in Cricut Design Space.
7.4. Layered Designs: Create layered cake toppers with different colors and textures to add dimension to your design.
Tips for Cake Topper Success
To ensure your cake topper-making experience is successful, keep these tips in mind:
8.1. Plan Ahead: Design and cut your cake topper well in advance of the event to allow for any adjustments or troubleshooting.
8.2. Experiment with Materials: Try different types of cardstock and materials to see which one works best for your design and theme.
8.3. Test the Size: Before cutting your final cake topper, test the size on a piece of paper or cardboard to ensure it fits the cake proportionately.
8.4. Keep It Simple: For a clean and elegant look, consider opting for a simple and minimalistic cake topper design.
Conclusion
Creating custom cake toppers with your Cricut cutting machine opens up a world of creative possibilities for your cake decorating endeavors. By following this step-by-step guide, you can design, cut, and assemble stunning cake toppers that will impress your guests and make any celebration extra special. Remember to choose high-quality materials, experiment with various design elements, and plan ahead to achieve a flawless cake topper that perfectly complements your cake and celebration theme. So, fire up your Cricut, unleash your creativity, and enjoy the process of making personalized cake toppers that will be cherished for years to come. Happy cake decorating!
To find out more about Cricut, please visit any of the following areas:
- How to use cricut infusible ink
- How to make stickers with cricut
- How to make cricut mat sticky again
- How to iron on cricut vinyl
- How to download fonts to cricut
- How to make stencils with cricut
- How to use a cricut
- What is a cricut machine
- How to cut cardstock on cricut
- How to make cake toppers with cricut
- How to put vinyl on cricut mat
- Why is my cricut not cutting
- How to make shirts with cricut
- How to slice in cricut design space
- How to use svg files with cricut craft room
- Why does my cricut keep disconnecting
- How to load cricut mat
- How to curve text on cricut
- How to curve an image on cricut
- How to use cricut card mat
- How to make coasters with cricut
- Why is my cricut power button red
- Why won’t my cricut connect to my computer
- How to calibrate cricut
- How to make stickers with cricut joy
- How to mirror on cricut
- How to do multiple colors on cricut
- How long does a cricut blade last
- How to emboss with cricut
- How to save cricut design as pdf
- Cricut Hat Press: A Comprehensive Guide on Usage - August 13, 2023
- Unlocking Creativity with the Cricut Joy: A Comprehensive Guide - August 12, 2023
- The Ultimate Guide to the Cricut Maker Bundle - August 11, 2023

