Coasters are not just practical items for protecting your furniture from drink spills; they also serve as stylish decor pieces that add a personal touch to your home. With the help of your Cricut cutting machine, you can create beautiful and personalized coasters that reflect your unique style and taste. In this comprehensive guide, we'll walk you through the step-by-step process of making coasters with your Cricut, along with tips, project ideas, and inspiration to elevate your coaster crafting game.
Understanding the Materials for Coasters
Before we begin crafting, let's explore the materials needed to make durable and functional coasters with your Cricut:
1. Cork Sheets:
Cork sheets are an excellent material for making coasters. They are absorbent, protecting your furniture from condensation, and provide a natural, rustic look.
2. Cricut Cutting Machine:
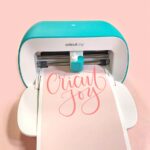
Whether you own a Cricut Explore Air, Maker, or Joy, any of these machines can cut intricate designs for your coasters.
3. Cricut Cutting Mat:
Using a cutting mat is essential for securing the cork sheet in place during cutting.
4. Adhesive Vinyl (Optional):
If you want to add colorful designs or personalized text to your coasters, adhesive vinyl is a great choice.
5. Heat Transfer Vinyl (Optional):
Heat transfer vinyl can be used to create coasters with intricate designs that are applied using heat.
6. Sealer (Optional):
For added protection and durability, you can apply a sealer to the finished coasters.
Step-by-Step Guide to Making Coasters with Cricut
Let's dive into the process of creating personalized coasters using your Cricut cutting machine:
Step 1: Prepare Your Design
- Launch Cricut Design Space on your computer or mobile device.
- Create or select the design you want to use for your coasters. You can choose from Cricut's pre-designed images or create your custom design.
Step 2: Set Up Your Material and Cutting Settings
- Measure and cut the cork sheets to the desired coaster size. Standard coaster dimensions are usually 3.5 inches by 3.5 inches or 4 inches by 4 inches.
- Place the cork sheet on a Cricut cutting mat, making sure it is securely adhered to the mat.
- In Cricut Design Space, select the material you're using (cork) and adjust the cutting settings accordingly.
Step 3: Cut the Coasters
- Load the cutting mat with the cork sheet into your Cricut machine.
- Follow the on-screen prompts in Design Space to cut the coasters.
- Once the cutting is complete, unload the mat and carefully remove the cut cork coasters.
Step 4: Add Adhesive or Heat Transfer Vinyl (Optional)
- If you want to add designs or text to your coasters, cut the desired shapes or letters from adhesive or heat transfer vinyl.
- Weed away the excess vinyl, leaving only your design on the vinyl backing.
- Use transfer tape for adhesive vinyl or heat transfer tape for heat transfer vinyl to transfer the design onto the cork coaster.
Step 5: Apply a Sealer (Optional)
- If you want to protect the surface of your coasters from moisture and wear, consider applying a sealer specifically designed for cork.
- Follow the manufacturer's instructions for applying the sealer and allow it to dry completely.
Step 6: Display and Enjoy!
- Once the coasters are dry and ready to use, display them on your coffee table, dining table, or bar area.
- Enjoy using your personalized coasters while protecting your furniture in style!
Tips and Techniques for Coaster Making
To enhance your coaster crafting experience, consider these tips and techniques:
1. Experiment with Materials:
While cork is a classic choice, consider using other materials like ceramic tiles, wood, or acrylic to create unique coasters.
2. Mix and Match Designs:
Combine different shapes, patterns, and colors to create a set of coasters that complement each other while showcasing your creativity.
3. Use Heat Transfer Vinyl for Intricate Designs:
Heat transfer vinyl allows you to create detailed and intricate designs that can't be achieved with adhesive vinyl.
4. Personalize with Names or Quotes:
Add a personal touch to your coasters by including names, initials, or favorite quotes.
Project Ideas for Coasters
Here are some creative project ideas to inspire your coaster making:
1. Photo Coasters:
Transfer your favorite photos onto coasters to make cherished keepsakes.
2. Seasonal Coasters:
Design coasters with seasonal themes to celebrate holidays and special occasions.
3. Geometric Designs:
Create modern and minimalist coasters with geometric patterns and shapes.
4. Monogram Coasters:
Make monogram coasters as personalized gifts for friends and family.
5. Inspirational Quotes:
Design coasters with motivational quotes to uplift and inspire.
Conclusion
Crafting personalized coasters with your Cricut cutting machine is a fun and rewarding way to add a personal touch to your home decor or create thoughtful gifts for loved ones. By following the step-by-step guide and incorporating the tips and techniques provided, you can create durable and stylish coasters that showcase your creativity and craftsmanship. Whether you're making photo coasters, seasonal designs, or inspirational quotes, the possibilities are endless with your Cricut. So, gather your materials, power up your Cricut machine, and embark on your coaster crafting adventure. Happy crafting!
To find out more about Cricut, please visit any of the following areas:
- How to use cricut infusible ink
- How to make stickers with cricut
- How to make cricut mat sticky again
- How to iron on cricut vinyl
- How to download fonts to cricut
- How to make stencils with cricut
- How to use a cricut
- What is a cricut machine
- How to cut cardstock on cricut
- How to make cake toppers with cricut
- How to put vinyl on cricut mat
- Why is my cricut not cutting
- How to make shirts with cricut
- How to slice in cricut design space
- How to use svg files with cricut craft room
- Why does my cricut keep disconnecting
- How to load cricut mat
- How to curve text on cricut
- How to curve an image on cricut
- How to use cricut card mat
- How to make coasters with cricut
- Why is my cricut power button red
- Why won’t my cricut connect to my computer
- How to calibrate cricut
- How to make stickers with cricut joy
- How to mirror on cricut
- How to do multiple colors on cricut
- How long does a cricut blade last
- How to emboss with cricut
- How to save cricut design as pdf
- Cricut Hat Press: A Comprehensive Guide on Usage - August 13, 2023
- Unlocking Creativity with the Cricut Joy: A Comprehensive Guide - August 12, 2023
- The Ultimate Guide to the Cricut Maker Bundle - August 11, 2023

