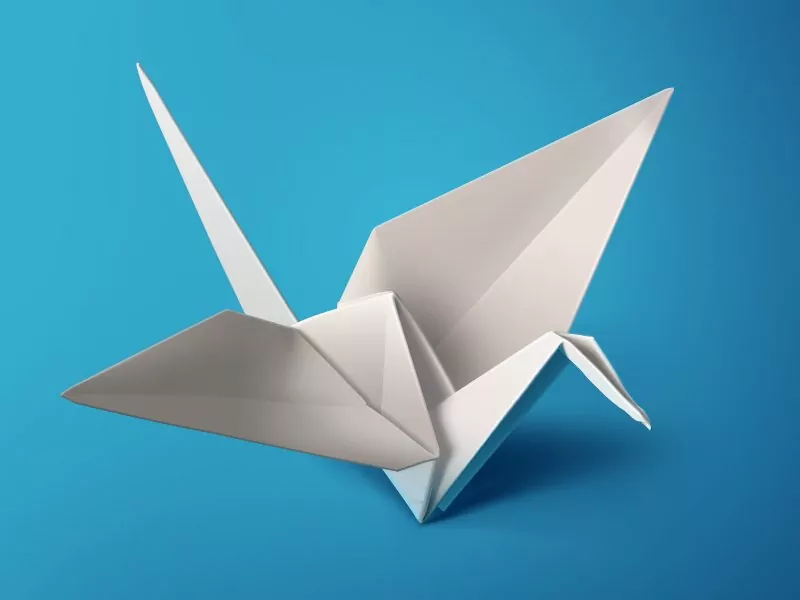
Origami cranes, those delicate and captivating paper sculptures, have the power to transform a simple sheet of paper into a symbol of grace, creativity, and patience. The timeless appeal of folding paper into intricate shapes has captured the hearts of people for generations. In this comprehensive guide, we will explore the step-by-step process of creating your own origami crane, from the initial folds to the final masterpiece. So, grab your origami paper and let's embark on a journey of creativity and craftsmanship.
video courtesy of JustOrigami
Origami Cranes: A Legacy of Tradition and Symbolism
Origami cranes have a rich cultural heritage, particularly in Japanese legend and tradition. The story of the "Thousand Paper Cranes" holds a special place, symbolizing hope, healing, and the fulfillment of wishes. In the face of adversity, origami cranes have become a beacon of optimism and a reminder of the power of human resilience. As we delve into the art of creating these exquisite paper sculptures, we honor the spirit of tradition and the beauty of origami.
Materials You'll Need:
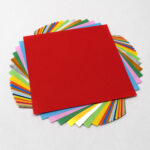
- One square sheet of origami paper (colored or plain)
- A clean and flat surface to work on
Step 1: Setting the Foundation
- Begin by placing your origami paper on the work surface with the colored side facing down.
- Fold the paper diagonally from the top corner to the bottom corner, creating a triangle shape.
- Ensure a crisp crease, then unfold the paper to reveal the central crease.
- Repeat the process by folding the paper diagonally from the left corner to the right corner, forming another triangle. Crease well and then unfold.
Step 2: Building the Base
- Flip the paper over to the colored side, creating a diamond shape with intersecting creases at the center.
- Fold the top layer of both the left and right corners towards the center, aligning them with the central crease.
- This step should create a kite shape. Now, fold the top flap of the kite shape downward, aligning it with the bottom edge.
- Once again, flip the paper over to the other side.
Step 3: Initial Folds and Preparations
- Fold the paper in half horizontally, then unfold it.
- Fold the paper in half vertically, then unfold it once more. You should now have a cross-shaped crease pattern on the paper.
Step 4: Shaping the Body
- Lift the paper by its top layer and bring the top corner down toward the center point, forming a triangle.
- Perform the same fold with the left corner, bringing it to the center as well.
- Flip the paper over and repeat the fold with the right corner.
- Flip the paper once more, and fold the bottom corner upwards, creating a smaller triangle.
Step 5: Accordion Folds
- Begin by folding the paper in half horizontally, creasing the center.
- Unfold the paper and then fold the left and right sides towards the center along the existing creases.
- Flip the paper over and fold the bottom tip upwards, aligning it with the bottom of the accordion folds.
Step 6: Embarking on the Squash Fold
- Gently lift the top flap of the paper and open it up.
- As you lift the flap, the paper will naturally start to collapse into a square shape.
- Press the paper down to form a diamond shape while squashing the sides.
- Flatten the paper into a triangle while maintaining the diamond shape.
Step 7: Crafting the Wings
- Lift the top layer of the left side and fold it toward the center along the crease, creating the left wing of the origami crane.
- Repeat the same fold with the right side to shape the right wing.
- Unfold the wings and flip the paper over.
Step 8: Inside Reverse Fold for Wing Formation
- Identify the creases near the top of the paper, where the wings are attached.
- Gently lift the top layer along the crease and pull it upwards.
- As you lift, the paper will begin to fold inside itself.
- Flatten the fold to create the wings, then tuck any excess paper inside.
Step 9: Sculpting the Body
- Flip the paper over to the other side.
- Fold both the left and right flaps towards the center.
- Lift the top layer of the left flap and fold it towards the center, forming a triangle.
- Repeat the same fold with the right flap.
Step 10: Finalizing Your Origami Crane
- Fold the bottom tip of the triangle upwards, tucking it slightly beneath the wings.
- Gently pull the head of the crane upwards, giving it a three-dimensional appearance.
- Your origami crane masterpiece is now complete!
Origami Cranes: A Fusion of Craftsmanship and Symbolism
As you admire your finished origami crane, take a moment to appreciate the fusion of craftsmanship and symbolism that it represents. In the folds and creases of the paper, you've captured the essence of an ancient art form that has transcended time and culture. The origami crane stands not only as a stunning creation but also as a testament to your patience, dedication, and the beauty of simplicity.
Origami's Endless Horizons
While mastering the origami crane is a significant accomplishment, it's merely the tip of the iceberg in the vast realm of origami possibilities. From intricate animals to mesmerizing geometric shapes, the world of origami offers endless opportunities for creative expression. Each fold, each twist, and each turn opens up new avenues for exploration and innovation.
The Journey's Reward
Crafting an origami crane is a rewarding journey that teaches you valuable lessons about patience, precision, and the beauty of transformation. As you transform a flat piece of paper into a graceful crane, you become a part of an artistic lineage that spans generations and continents. Your origami crane is a testament to your creativity, a reminder of the power of your hands to bring beauty and artistry into the world.
Embracing the Legacy of Origami Cranes
In a world that often moves at a frenetic pace, origami cranes offer a moment of tranquility and reflection. As you fold, you engage in a meditative process that allows you to disconnect from the chaos and reconnect with the present moment. The art of origami is more than just paper-folding; it's a way of centering yourself and finding solace in the gentle rhythm of the creases.
In Conclusion
Creating an origami crane is a journey that merges tradition, artistry, and mindfulness. With every fold, you're not just shaping paper; you're shaping a piece of yourself. The origami crane becomes a bridge between the past and the present, a connection to cultures and stories that have stood the test of time. So, whether you're a novice or a seasoned origami enthusiast, take a moment to savor the process, embrace the challenge, and revel in the beauty of the origami crane – a timeless symbol of elegance and creativity.the left and right flaps towards the center.
- Cricut Hat Press: A Comprehensive Guide on Usage - August 13, 2023
- Unlocking Creativity with the Cricut Joy: A Comprehensive Guide - August 12, 2023
- The Ultimate Guide to the Cricut Maker Bundle - August 11, 2023

