The Cricut Joy is a compact cutting machine that offers endless creative possibilities for crafters and hobbyists. One of the most popular applications of the Cricut Joy is making custom stickers. Whether you want to personalize your planner, create unique labels, or design fun stickers for gifts, the Cricut Joy can help you bring your ideas to life with ease and precision. In this comprehensive guide, we'll walk you through the step-by-step process of making stickers with your Cricut Joy, along with tips, tricks, and project ideas to spark your creativity.
Understanding the Cricut Joy and Sticker Materials
Before we dive into the practical steps, let's familiarize ourselves with the Cricut Joy and the materials suitable for making stickers:
What is Cricut Joy?
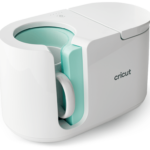
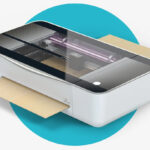
The Cricut Joy is a compact and portable cutting machine designed for smaller crafting projects. It features a width of 5.5 inches and can cut materials up to 20 feet long, making it ideal for quick and easy projects like stickers, cards, and labels.
Suitable Sticker Materials:
The Cricut Joy can cut a variety of materials suitable for stickers, including:
Cricut Smart Vinyl: Smart vinyl is specially designed to work with the Cricut Joy without the need for a cutting mat. It comes in various colors and finishes, including permanent, removable, and writable vinyl.
Cricut Joy Infusible Ink Transfer Sheets: Infusible Ink is a heat-transfer material that allows you to create vibrant and permanent stickers by transferring the ink onto compatible surfaces using heat.
Cricut Joy Adhesive-Backed Deluxe Paper: This paper is perfect for creating intricate and colorful stickers. It has an adhesive backing, eliminating the need for glue.
Cricut Joy Insert Cards with Adhesive Backing: These cards can be cut into stickers and used as greeting cards, tags, or labels.
Step-by-Step Guide to Making Stickers with Cricut Joy
Let's walk through the process of creating custom stickers with your Cricut Joy:
Step 1: Set Up Your Design Space
Power on your Cricut Joy and connect it to your computer or mobile device using Bluetooth.
Launch Cricut Design Space on your device and sign in to your account.
Start a new project by clicking on "New Project" or open an existing project.
Step 2: Choose Your Sticker Design
Browse the Cricut Design Space library for sticker designs or upload your custom designs.
Select a design that suits your project and add it to your canvas.
Step 3: Adjust the Design Size
Resize the design on the canvas to fit the dimensions of your stickers. You can also duplicate the design if you want multiple stickers of the same design.
Ensure that the design stays within the cutting area of the Cricut Joy (5.5 inches wide).
Step 4: Select the Material
In the Design Space toolbar, click on "Make It" to proceed to the cutting preview.
In the cutting preview, select the material you'll be using for your stickers. If you're using Smart Vinyl, make sure to choose the appropriate type (permanent, removable, or writable).
Step 5: Load the Material
If you're using Smart Vinyl or Smart Paper, you won't need a cutting mat. Simply load the material into the Cricut Joy by following the on-screen instructions.
If you're using other materials like Infusible Ink Transfer Sheets or Deluxe Paper, use a Cricut Joy cutting mat to load the material.
Step 6: Mirror the Design (Optional)
- If you're using adhesive vinyl, you may want to mirror the design to ensure the sticker is applied correctly. Click on "Mirror" in the toolbar before cutting if needed.
Step 7: Cut the Stickers
Once your Cricut Joy is ready to cut, click on "Continue" in Design Space to initiate the cutting process.
Follow the prompts to load the material into the machine and press the "Go" or "Cut" button on the Cricut Joy.
The Cricut Joy will now cut your stickers based on the design and material settings.
Step 8: Weed the Stickers
Once the cutting is complete, unload the material from the Cricut Joy.
If you used Smart Vinyl or Smart Paper, you can skip this step, as there's no need to weed the stickers. For other materials like Deluxe Paper or Infusible Ink Transfer Sheets, carefully weed away the excess material around the stickers.
Step 9: Apply Transfer Tape (For Adhesive Vinyl)
- If you used adhesive vinyl for your stickers, apply transfer tape over the cut designs. This will allow you to transfer the stickers from the backing sheet to your desired surface easily.
Step 10: Transfer the Stickers
Carefully peel the sticker design off the backing sheet using the transfer tape (if applicable).
Place the sticker on your desired surface, smoothing it out to remove any bubbles or wrinkles.
If you used adhesive vinyl, press the sticker firmly onto the surface to ensure it adheres properly.
If you used Infusible Ink Transfer Sheets, follow the specific heat-transfer instructions provided with the material.
Step 11: Enjoy Your Custom Stickers
- Once the stickers are applied, step back and admire your handiwork! Your custom stickers are now ready to add a personal touch to your projects, gifts, or decor.
Tips and Techniques for Making Stickers with Cricut Joy
To make the most of your sticker-making experience with the Cricut Joy, consider these tips and techniques:
1. Use Quality Materials:
Choose high-quality sticker materials that suit your project needs. Cricut Smart Vinyl and Infusible Ink Transfer Sheets are excellent options for durable and professional-looking stickers.
2. Test Cut:
Before cutting a large batch of stickers, perform a test cut to ensure your design and settings are correct.
3. Apply Even Pressure:
When adhering adhesive vinyl stickers, apply even pressure to ensure they stick firmly and avoid peeling.
4. Use Multiple Colors:
Experiment with different colors and materials to create vibrant and eye-catching sticker designs.
Project Ideas for Cricut Joy Stickers
Here are some fun and creative project ideas using stickers made with Cricut Joy:
1. Planner Stickers:
Create personalized stickers to decorate and organize your planner or bullet journal.
2. Gift Labels:
Design custom gift labels for special occasions and holidays.
3. Laptop Decals:
Make unique laptop decals to add personality to your devices.
4. Water Bottle Stickers:
Craft waterproof stickers for water bottles, travel mugs, and tumblers.
5. Jar and Container Labels:
Organize your kitchen and pantry with custom labels for jars and containers.
6. Party Favor Stickers:
Design stickers for party favor bags and boxes for birthdays or celebrations.
Conclusion
The Cricut Joy is a fantastic tool for creating custom stickers that add a personal touch to your projects and everyday items. By following the step-by-step guide and incorporating the tips and techniques provided, you can easily make professional-looking stickers for various purposes. Whether you're decorating your planner, labeling containers, or designing unique gifts, the possibilities are endless with the Cricut Joy. So, gather your sticker materials, power up your Cricut Joy, and let your creativity shine as you embark on your sticker-making adventure! Happy crafting!
To find out more about Cricut, please visit any of the following areas:
- How to use cricut infusible ink
- How to make stickers with cricut
- How to make cricut mat sticky again
- How to iron on cricut vinyl
- How to download fonts to cricut
- How to make stencils with cricut
- How to use a cricut
- What is a cricut machine
- How to cut cardstock on cricut
- How to make cake toppers with cricut
- How to put vinyl on cricut mat
- Why is my cricut not cutting
- How to make shirts with cricut
- How to slice in cricut design space
- How to use svg files with cricut craft room
- Why does my cricut keep disconnecting
- How to load cricut mat
- How to curve text on cricut
- How to curve an image on cricut
- How to use cricut card mat
- How to make coasters with cricut
- Why is my cricut power button red
- Why won’t my cricut connect to my computer
- How to calibrate cricut
- How to make stickers with cricut joy
- How to mirror on cricut
- How to do multiple colors on cricut
- How long does a cricut blade last
- How to emboss with cricut
- How to save cricut design as pdf
- Cricut Hat Press: A Comprehensive Guide on Usage - August 13, 2023
- Unlocking Creativity with the Cricut Joy: A Comprehensive Guide - August 12, 2023
- The Ultimate Guide to the Cricut Maker Bundle - August 11, 2023


